10 Reasons to Visit Jasper in the Winter!

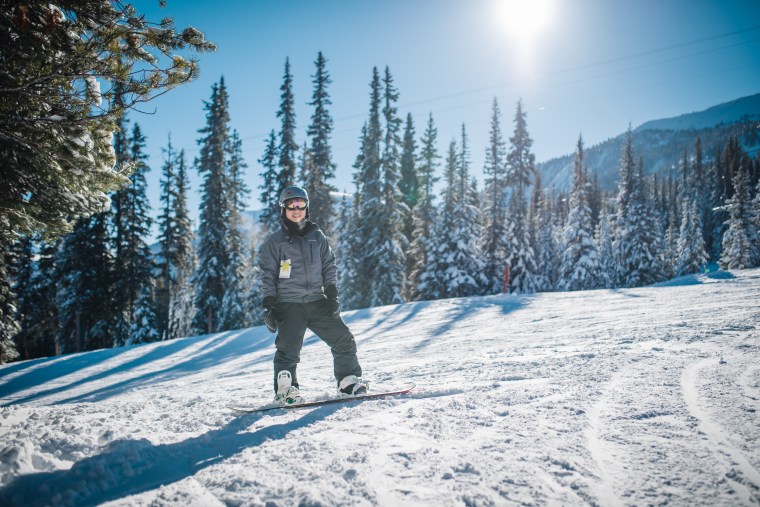
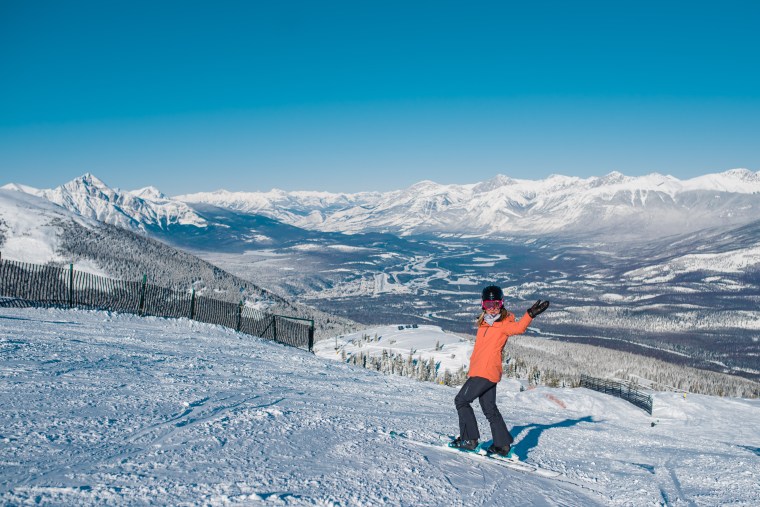
  1. Ski Marmot Basin, the parking lots are staggered up the mountain so if you want to bring a cooler and come back to your car for snacks or wardrobe changes it’s convenient. Or take a shuttle from the hotel so you can enjoy some spicy Cesar’s with your lunch!

Ski Marmot Basin

Jasper February 2018 (22 of 132)Jasper February 2018 (34 of 132)Jasper February 2018 (31 of 132)

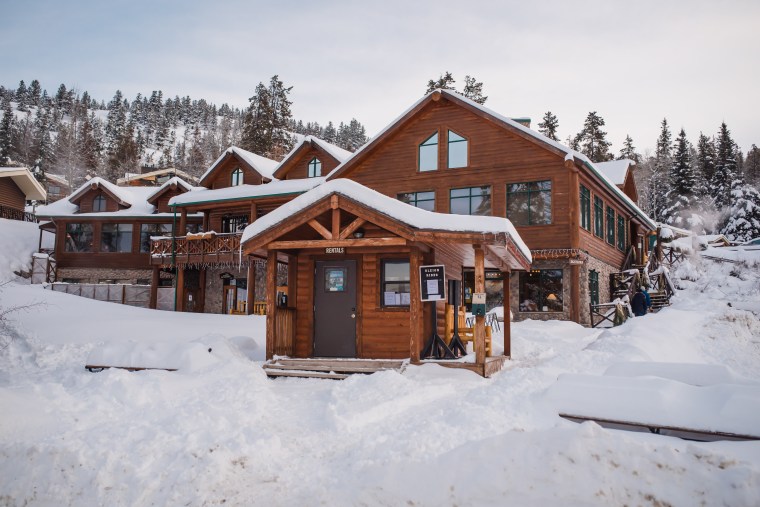
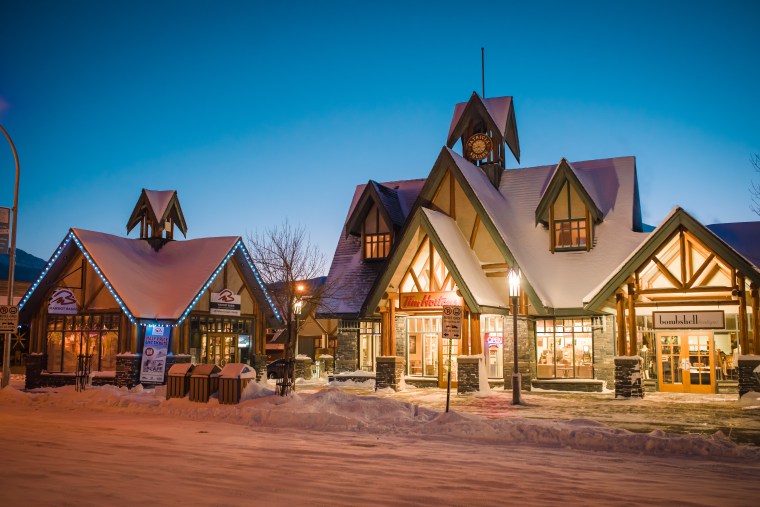
2. Stay at the Whistler’s Inn, is located in the center of town and has two rooftop hot tubs.

Stay in Whistler’s Inn

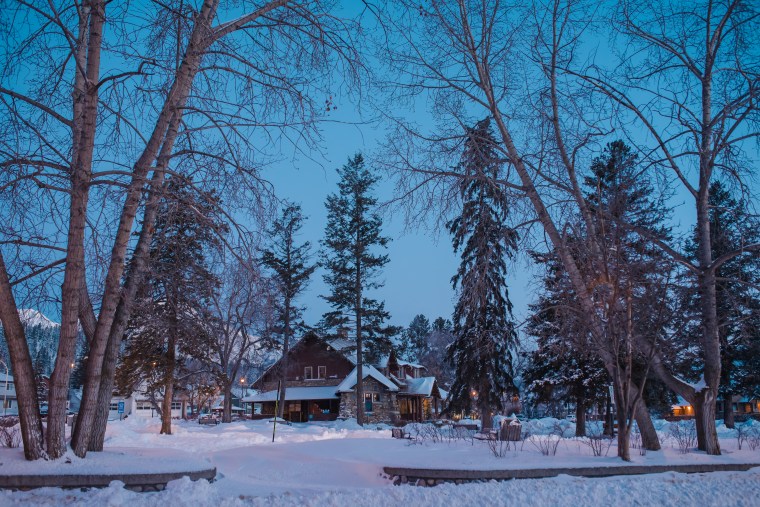
3. Visit Jasper Park Lodge for Sunday buffet brunch.  I’ve stayed here a few times; it’s quite the treat, but also quite the expense. If you can afford it, treat yourself! If not, pop in to enjoy their amenities, go to the spa and enjoy the outdoor heated pool, rent skates and do some loops, or enjoy a Sunday breakfast brunch. The hotel has a rustic charm and it worth visiting just to walk the grounds with a hot chocolate and enjoy a cocktail in the lounge.

Jasper February 2018 (64 of 132)

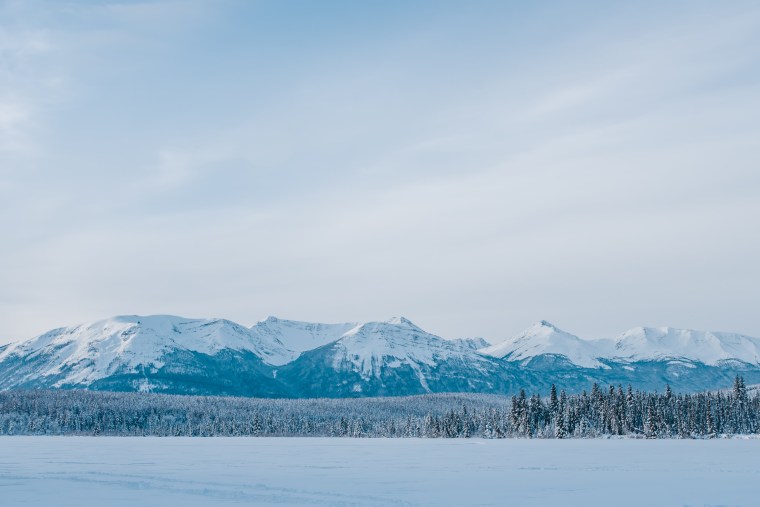
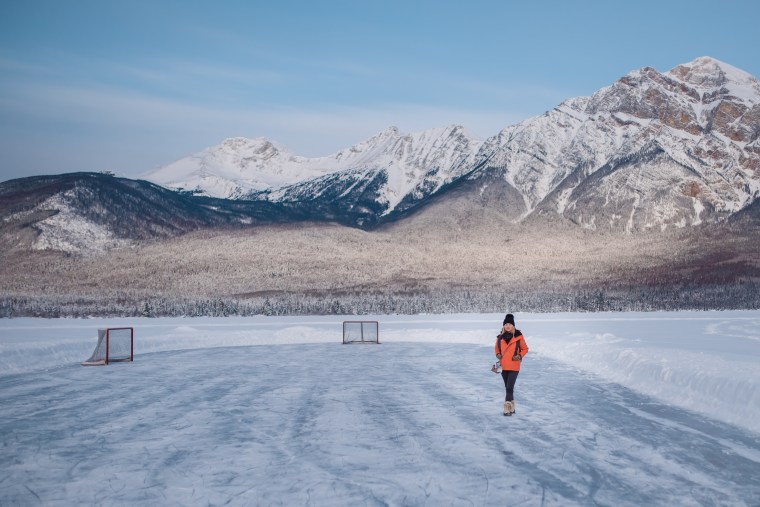
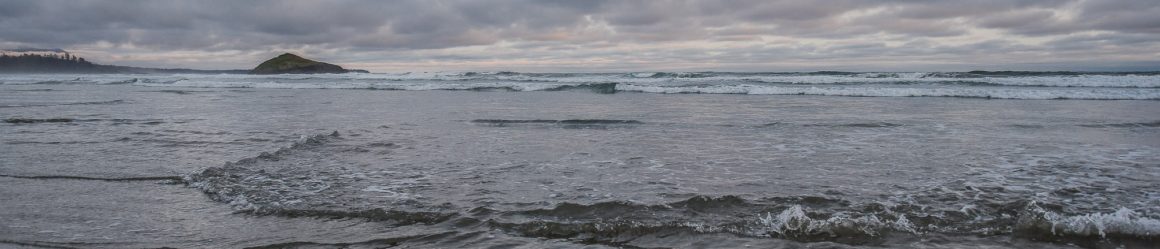
4. Visit Pyramid Lake for pictures where a tight group of trees sits on a remote island circled by mountains. We went early and were lucky to get the private little island to ourselves. Strike a pose and re-create it in each season!

Pyramid Lake

Jasper February 2018 (68 of 132)Jasper February 2018 (67 of 132)Jasper February 2018 (63 of 132)

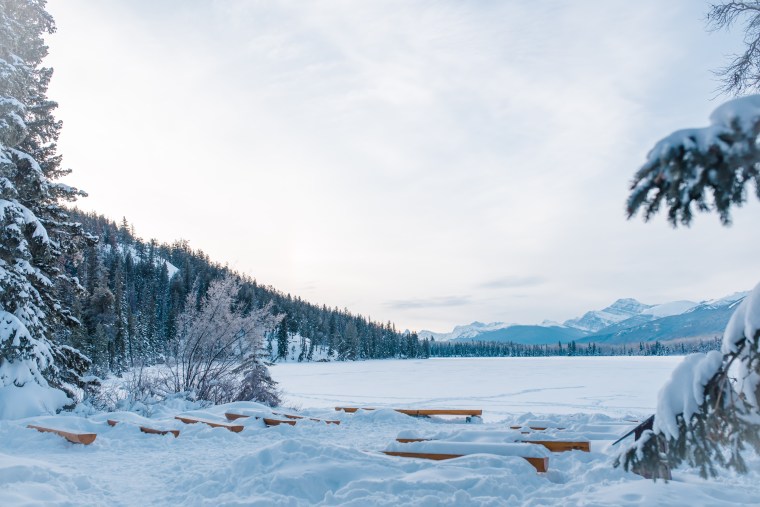
You can also pick up cross country ski’s, skates or snowshoes at Pyramid Lake Resort.

Jasper February 2018 (43 of 132)Jasper February 2018 (56 of 132)

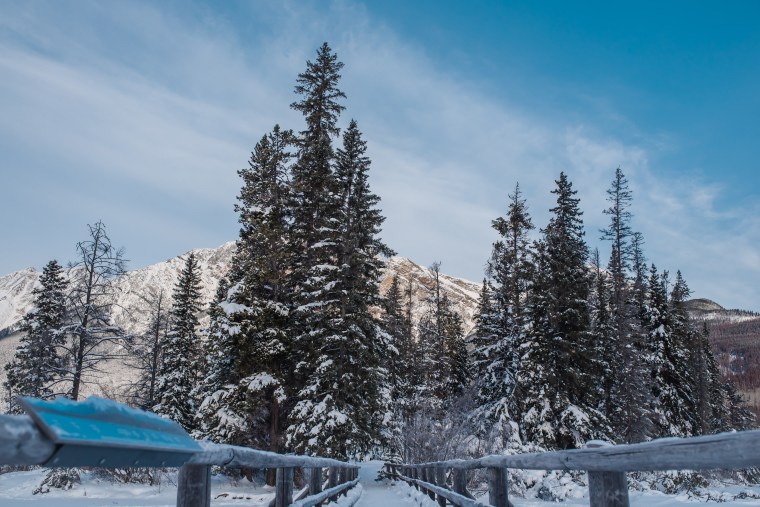
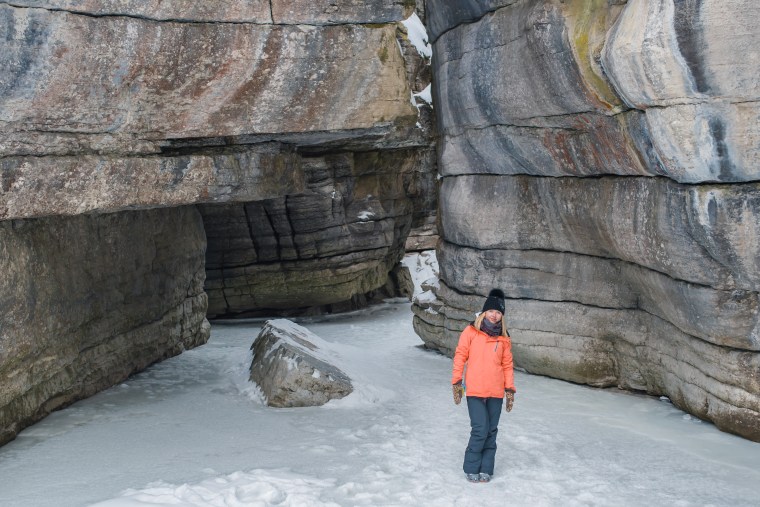
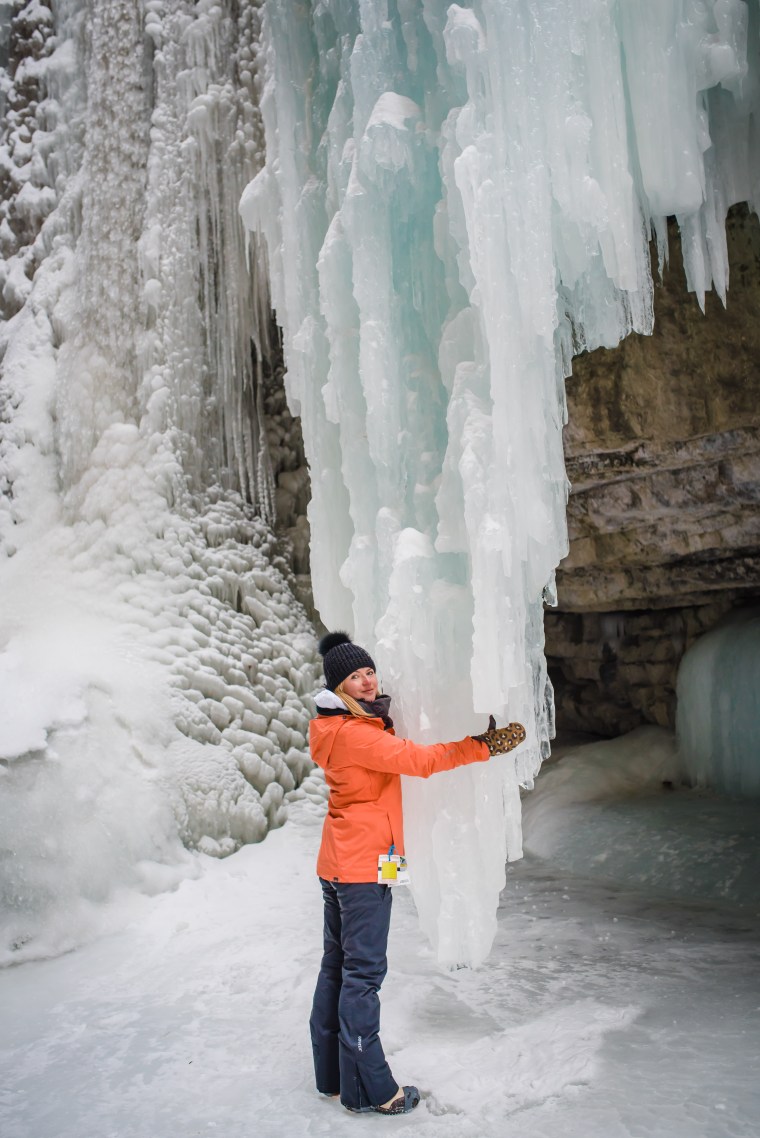
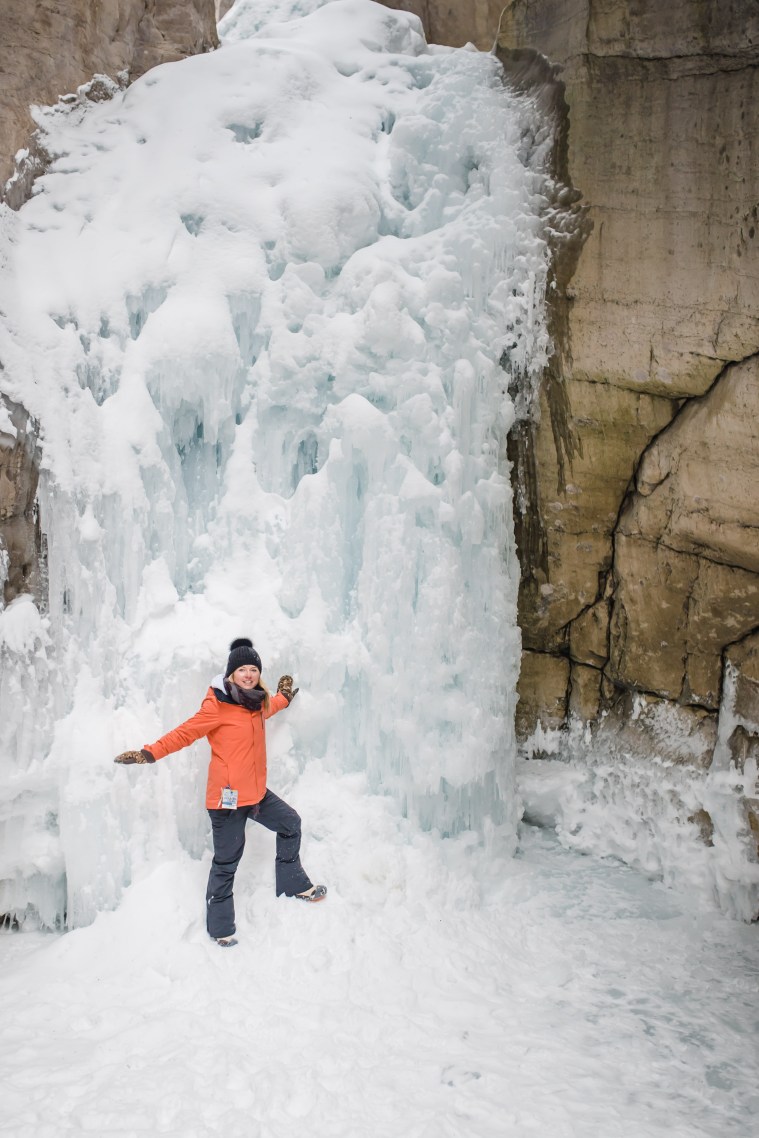
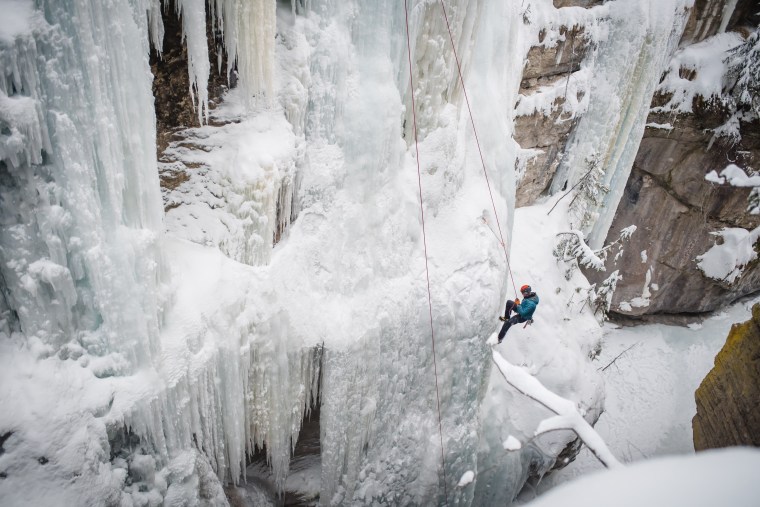
5. Participate in a hike on the Maligne Canyon, make sure you purchase foot covers for the walk. You are walking on sheets of ice, pick some up at the store in town, they are worth the money.  Or, if you are feeling extra adventurous, try ice climbing. I’ve visited the canyon three times now and never miss it; each visit is unique with the amount of snow or colors exposed to the frozen water. It’s an easy trek that will take about an hour, depending on how many pictures you stop to take…

Maligne Canyon

Jasper February 2018 (125 of 132)Jasper February 2018 (91 of 132)Jasper February 2018 (107 of 132)Jasper February 2018 (118 of 132)Jasper February 2018 (122 of 132)

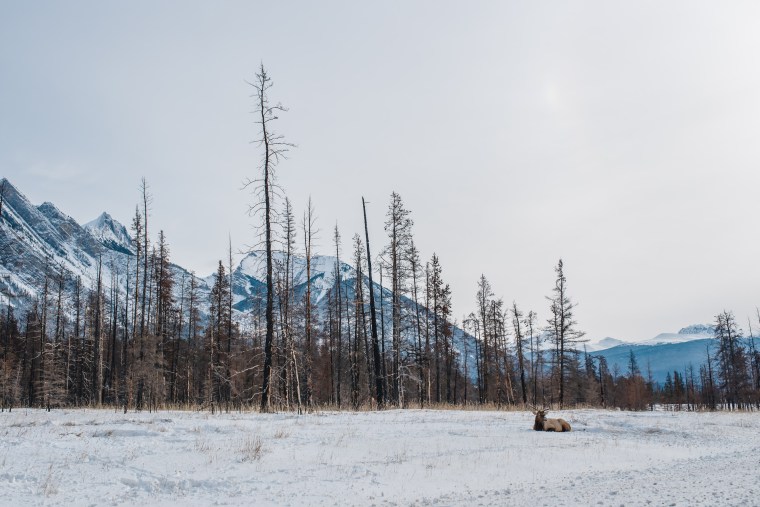
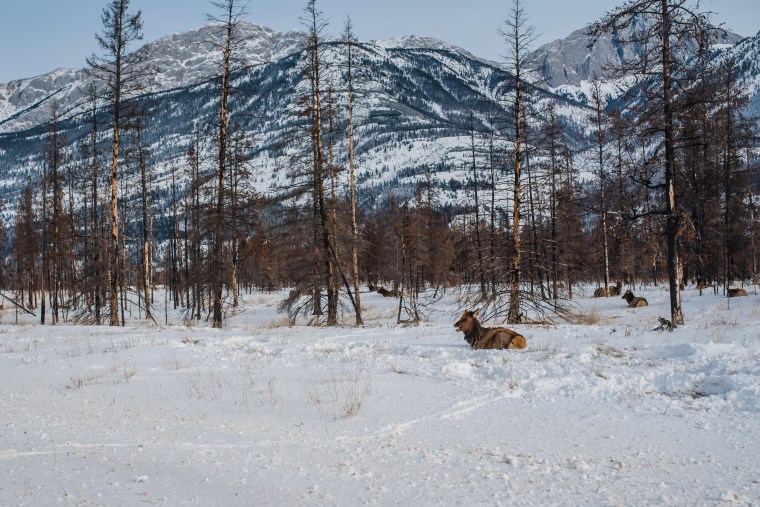
6. Spot the locals! Jasper is known for elk, bighorn sheep and moose roaming close to the roads.

Local Jasper Residents

Jasper February 2018 (126 of 132)Jasper February 2018 (129 of 132)Jasper February 2018 (130 of 132)

7. Satisfy your sweet tooth at Candy Bear’s Lair . There’s a great candy shop for your sweet tooth’s with fresh fudge and chocolate bear paws.

Jasper February 2018 (2 of 132)

8. Dance party? If you still have the energy to shake it at night, go to the 4peaks Night Club.

9. Enjoy a great beer at the Jasper Brewing Company, and I like the Blackeye Blueberry Vanilla Ale.

Jasper February 2018 (8 of 132)

10. Um, I like photos, of any kind, go if only for the photo opportunities!

Jasper February 2018 (47 of 132)Jasper February 2018 (38 of 132)

Valentine’s Paleo Chocolate Cake

Valentine’s day is for love, and I love chocolate! Since I have a pretty big sweet tooth I decided to make my own cake and share with those I love. Mostly my Dad, he gets a lot of love this V-day since I’m still a single lady.  Making something from scratch makes me appreciate and savor dessert more. This cake turned out fabulously was work the work!

Valentines 2018 (4 of 6)Valentines 2018 (5 of 6) 

I swiped this recipe from the ambitious kitchen

INGREDIENTS
  • 3/4 cup virgin coconut oil, melted and cooled
  • 1 3/4 cup coconut sugar
  • 4 large eggs, at room temperature
  • 1 cup Almond Breeze Unsweetened Vanilla almondmilk
  • 1 tablespoon pure vanilla extract
  • 1 tablespoon apple cider vinegar
  • 3 cups packed blanched fine almond flour
  • 3/4 cup unsweetened cocoa powder (use a high quality version)
  • 1/4 cup coconut flour
  • 2 teaspoons baking soda
  • ½ teaspoon salt
  • For the paleo chocolate frosting:
  • 1 (14 ounce) can coconut cream
  • 1 ½ cups dairy free chocolate chips
  • Pinch of salt

I used two baking pans, and yes the parchment paper is a must, easy to arrange the cake after and risk ripping it. To enhance it,  I used pecans and raspberries, but you can change the fruit or add valentine’s inspired candies if you wish.

Valentines 2018 (3 of 6)

  1. Making your frosting: Add the coconut cream, chocolate chips and a pinch of salt to a small pot and place over low heat. Whisk until melted. Transfer to a bowl, cover with plastic wrap and place in the fridge to harden for 6 hours or until hard. Overnight is best!
  2. Preheat oven to 350 degrees F. Line the bottom of three 9-inch round cake pans with parchment paper rounds. Spray parchment paper and side of pan with nonstick cooking spray. YOU SHOULD USE PARCHMENT PAPER or the cake is likely to stick. Please do not forget.
  3. In a large bowl, mix together the melted and cooled coconut oil, coconut sugar, eggs, vanilla and apple cider vinegar until smooth. Add almond milk and beat once more until mixture is well incorporated.
  4. In a separate bowl, whisk the almond flour, cocoa powder, coconut flour, baking soda and salt together. Add the dry ingredients to the wet ingredients and mix well. Mixture will be on the thicker side.
  5. Divide batter evenly between pans and spread out with a spatula to smooth the tops. Bake for 20-30 minutes until a tester comes out clean or with just a few crumbs attached; rotating the pans halfway through baking. Let cake cool in the pan for 15 minutes then transfer to the fridge to finish cooling completely. Allow cake to cool in the fridge for at least an hour before removing from the pan and frosting. The cake should be room temperature when you frost it. This is very important. Cake can be made a day ahead if you’d like!
  6. Finish making your frosting: Scoop the hardened chocolate coconut cream frosting mixture into a large bowl. Use a hand mixer or a KitchenAid mixer to beat frosting until peaks form and it looks nice, fluffy and creamy. Use immediately!
  7. Layer cake, using about 1/3 -½ cup frosting between each layer, then frost the top and sides with remaining frosting. Serves 12-16! Should be transferred to the fridge.

V-Day Cake

Valentines 2018 (2 of 6)

Stuffed Peppers and my New Favorite Muffins!

Healthy eating for me means color! I went on a trip to the grocery store with my dad this weekend to grab a few ingredients. I like having a few staple items in the fridge at all times for quick, healthy meals. My father turns to me to ask “what do we need?”. My reply, get anything green! What’s your favorite color to cook with?

Here is an image of the weekends cooking. I loosely used a stuffed peppers whole foods recipe I found from the Jar of Lemons Website.

Ingredients

  • 1/2 lb ground turkey
  • 1 onion
  • mushrooms
  • 1 cup spinach
  • 1/2 tsp ground pepper
  • 1/4 tsp cayenne
  • 1 tsp paprika
  • 1/2 tsp chili powder
  • 1 tsp garlic
  • 1/2 tsp cumin
  • 1/2 tsp cinnamon
  • 4 green peppers
  • handful of Pumpkin Seeds
  • handful Mozzarella

Instructions

  1. Preheat oven to 425 degrees.
  2. Cook the ground turkey.
  3. While the ground turkey is cooking, cut the peppers in halves and clean out the middle of each one.
  4. Set one pepper aside and finely chop.
  5. When the turkey is almost finished cooking, add in the spinach and finely chopped pepper or any veggies on hand.
  6. Add in the ground pepper, cayenne, paprika, chili powder, garlic, and cumin.
  7. Stuff each pepper half with the turkey mixture and top with cheese.
  8. Bake for 20 minutes (or until peppers are nearly soft).
  9. Serve hot and enjoy!

I used green peppers  and added pumpkin seeds instead of pine nuts and a dash of cinnamon to the mix. I only used half of the meat, the rest I will toss into a pasta later in the week. I also chopped up more veggies to use in weekend morning omelettes.

This is one of those recipes you can make your own. Use chickpeas, chicken, ground turkey or beef, saute some veggies, stuff and cook!

Stuffed Green Peppers

Food Feb 2018 (1 of 1)

These tumeric blueberry muffins turned out soft and not too sweet. I like to take time and arrange my foods to practice some photography skills. I copied the recipe from the Green Kitchen food blog.

Healthy Tumeric Blueberry Muffins

Food Feb 2018-3 (1 of 1)

Turmeric & Blueberry Breakfast Muffins with a Granola Topping
Makes 12 large or 15 smaller

Dry ingredients
100 g / 1 cup walnuts
85 g /1 cup rolled oats, use gluten free if intolerant
90 g / 2/3 cup buckwheat flour + 2 tbsp arrowroot (or potato starch)
1 1/2 tsp baking powder
1/2 tsp baking soda
1 tbsp turmeric (use a little less if you are not used to the flavor)
1 tsp freshly ground cardamom
½ tsp sea salt
a pinch black pepper

Wet ingredients
160 ml / 2/3 cup buttermilk or plant yogurt
80 ml / 1/3 cup olive oil or butter
2 ripe bananas, mashed
5 fresh dates, mashed
3 large eggs (or 3 tbsp chia seeds mixed with 9 tbsp water)

A large handful blueberries, frozen or fresh

Granola topping
1/3 cup rolled oats
2 tbsp olive oil/coconut oil
1 tbsp runny honey

Preheat the oven to 400°F / 200°C. Line a muffin pan with paper liners or grease the pan with oil or butter. Add walnuts and rolled oats to a food processor or blender (or mortle) and mix quickly into a coarse flour. Transfer to a large mixing bowl together with the rest of the dry ingredients. Add buttermilk, oil, bananas and dates to the food processor or blender and mix until smooth, then transfer to the mixing bowl with the dry ingredients. Crack the eggs in a separate bowl and beat them for about a minute before adding them as well. Use a spatula to carefully fold everything until combined. Divide the batter into the muffin tins, drop a bunch of blueberries on top of each muffin and gently push them down a bit. Mix together the granola crumble in a small bowl and add it on top of the muffins. Bake for about 18-20 minutes. Best enjoyed still warm from the oven.

I’d love to know, what’s your favorite healthy muffin recipe?


Veggie Lasanga

This is my second attempt at going sugar-free! Inspired by the current book I’m reading, Year of No Sugar, by Eve O. Schaub, I opted to try a new recipe. A vegetarian lasagna, both sugar-free and gluten-free, as a way to get more veggies and sharpen my culinary skills. I started out with making the veggie base, and it consisted of roasting a few vegetables in the oven, then adding a container of pumpkin puree and turning it into a puree in a Vitamix.

Tons of green veggies, ricotta, and mozzarella cheese were the main staples for this healthy meal! I found the recipe when I signed up for the 8 week, I quit sugar program.


Veggie Lasagna (2 of 14)Veggie Lasagna (3 of 14)Veggie Lasagna 3 (1 of 1)Veggie Lasagna (8 of 14)Veggie Lasagna (12 of 14)Veggie Lasagna (1 of 1)

Voila!

Veggie Lasagna 4 (1 of 1)